Last updated on 5th October 2023 at 14:26 by Alex Nicholas
A multitude of things influence the SEO of your Shopify site, and one of these features is the Shopify sitemap, and whilst an XML sitemap might be perplexing for Shopify store owners and might feel like it belongs to advanced SEO, they’re really only for search engines like Google to analyse and index their content, not for the site’s users (most of the time).
Ultimately, like removing the powered by Shopify button at the footer of your store, what happens with your sitemap on Shopify won’t affect things like your conversion rate.
Google, Bing, and Yandex can easily find the content on your website thanks to sitemap.xml files. Rather than depending on a convoluted site layout, the sitemap.xml allows search engines another way to find your site’s information.
Because URLs in your sitemap.xml will be crawled more frequently and give canonical signals to Google if all other criteria are equal, your key or money pages should be included within the sitemap.xml.
And, given the rising popularity and versatility of Shopify sites, you should be aware of how sitemap.xml files are generated by Shopify. I want to give a resource for any Shopify sitemap.xml questions you might need answering so you can learn more about what they are and how they’re used.
But first and foremost!
Why Do I Need A Shopify Sitemap and why do I need one?
A Shopify sitemap is an XML file that search engine crawlers use to discover your website’s URLs. The Shopify sitemap will automatically produce links to your category, product, and news pages. Manually editing the Shopify sitemap.xml file is not possible.
What is the location of your Shopify sitemap?
To find your sitemap.xml, simply add the string “/sitemap.xml” to the end of your root domain. The sitemap for the domain “yourperfectdomain.com” is displayed in this example – yourperfectdomain.com/sitemap.xml
What content is in the Sitemap?
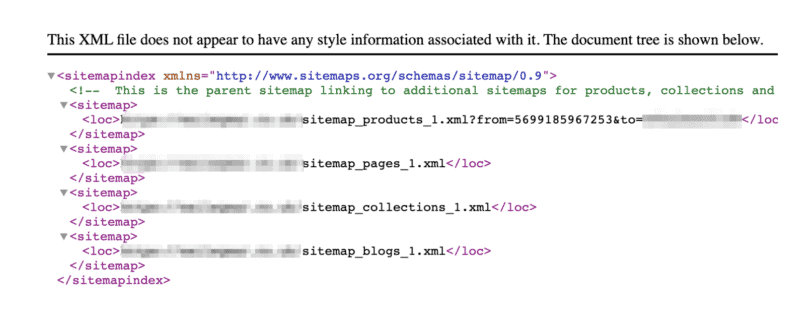
After you’ve visited this page, you’ll be able to see the sitemap index file for your Shopify site. A sitemap.xml index file is the main or parent sitemap that contains links to all of your website’s sitemaps. These are known as child sitemaps, and they’re often organised by page type.
Below, you will see the four child sitemap links:

Shopify will create four child sitemaps for the following page types:
- Product Pages (sitemap_products_1.xml)
- Collection Pages (sitemap_collections_1.xml)
- Blog Posts (sitemap_blogs_1.xml)
- Pages (sitemap_pages_1.xml)
This helps you organise your sitemap.xml into logical page categories. Shopify may create additional child sitemaps in the index file if your website has a large number of products. These further child sitemaps will be generated automatically after the initial child sitemap reaches in excess of 5,000 URLs.
A Sitemap.xml file can have a maximum of 50,000 URLs. Creating these additional child sitemaps is how Shopify remains within that limit.
Child Sitemap File
You’ll get a list of URLs for each page type when you click on a specific child sitemap link. This offers a thorough list of all URLs in that category to Google and other search engines. Customers can instantly access all of the content on your site without having to rely on it’s architecture.
When you look at your Shopify child sitemaps, you will see that each entry can have many elements:
- <url>: The URL of that particular page
- <lastmod>: The last modification date of the page
- <changefreq>: An estimate of how often the page is likely to change
- <image:loc>: The featured image of that page
- <image:title>: The title of the page the image is on
Each of these unique entries in the child sitemaps should contain all of the content on your site, from each product collection page to each product page.
Is it possible to customise or upload your own sitemap?
Unfortunately, at the time of writing, store owners cannot add their own custom XML sitemap to Shopify and must instead rely on their autogenerated file.
Whilst you can edit code within your eCommerce website, the Shopify XML sitemap is off-limits.
And to be honest, I prefer autogenerated sitemap.xml files in general, despite the fact that this can be a bit restricted. Your sitemap may not be updated as your store’s pages are added and removed if you’re using a bespoke static solution. This could be a huge worry because inventory in eCommerce stores is constantly changing. However, Shopify’s autogenerated sitemap.xml has proven to be a great fit for nearly all Shopify users.
Submit your sitemap to Google Search Console
Submitting your Shopify sitemap is quick and easy, here’s the basic method to submit it to Google Search Console:
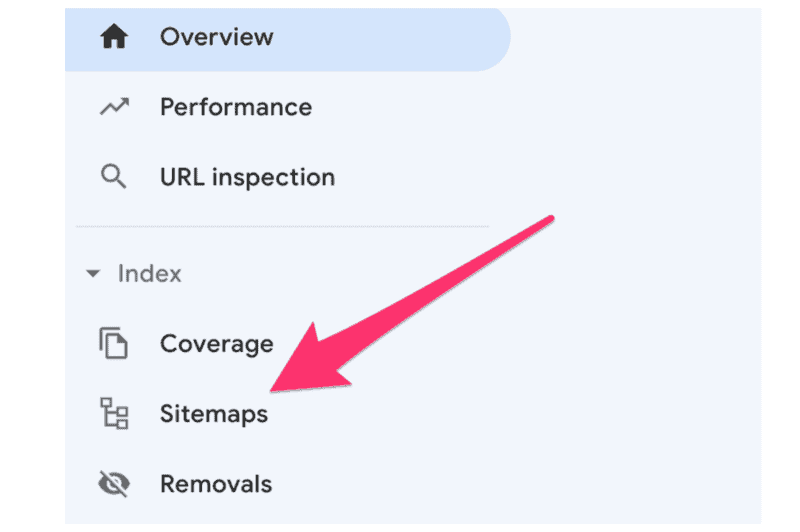
To get started, go to the Google Search Console website, and within the left-hand menu, select “Sitemaps.”

Here’s where you’ll find the “Add a new sitemap” form. Type sitemap.xml in the enter sitemap URL field.

Click Submit.

You might already have submitted sitemaps, in which case you need not worry too much because Google will systematically check your submitted XML sitemap and they’ll see if things have changed.
Google Search Console Couldn’t Find Your Sitemap?
Unfortunately, this is a recognised issue with the new Google Search Console that can impact anyone, not just Shopify users. It’s usually caused by a bug in Google Search Console, and there don’t seem to be any straightforward fixes.
If you’re having trouble uploading your Shopify sitemap, make sure your GSC property is set up correctly. If you’ve set up Search Console on the myshopify.com subdomain that you will have been given at the setup of your site by Shopify, this could be causing the problem. Instead, add a Search Console property to your main/root domain.
What does “Indexed, but not submitted in sitemap” mean?
If you use Google Search Console and are used to its reporting tools, you may be familiar with the Index Coverage report. This is a useful tool that shows you how Google crawls and indexes your URLs in real-time. This report contains a wealth of information on how Google handles canonical URL parameters, URLs, and 404 errors.
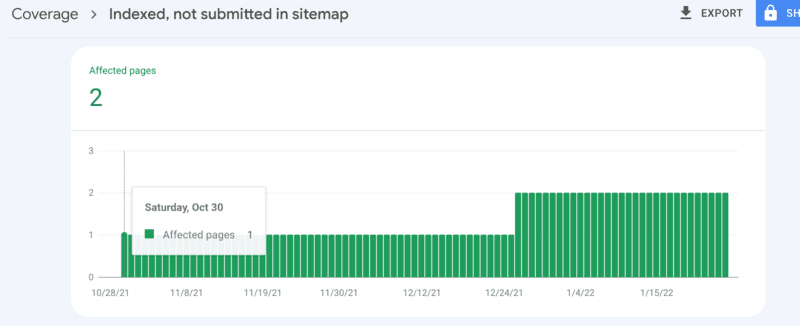
Google’s handling of your sitemap.xml files is also detailed in the Index Coverage Report. This data is available in Search Console under Coverage > Valid > Index, not included in sitemap.
Google should report URLs here:

As a Shopify SEO consultant, I’ve found that the URLs specified here aren’t a major concern or high-priority fixes in general. Some of the most prevalent reasons for Shopify reporting URLs as “Indexed, not submitted in sitemap” are as follows:
- False positives (False Positives): The URLs listed above are frequently discovered in the Shopify sitemap
- /collections/all/ pages: Shopify’s sitemap.xml does not appear to include these and their paginated URLs.
- Pagination: We regularly discover scenarios where pagination is missing from your sitemap.xml.
That’s a wrap
So now you now have an understanding of the Shopify sitemap.xml file and its main function in your Shopify store and how it acts as part of a wider SEO guide within your Shopify website. The main goal of your sitemap.xml file is to make it simple for Google to access and crawl the content of your website, which can be confusing to users.
This is especially true for eCommerce sites, because if Google only utilises your site’s standard design, it may have a harder time identifying content on larger sites, which would lead to fewer pages being indexed and lower traffic and profits.
A sitemap.xml file defends against this by giving search engines a “home base” list to crawl through. This is especially important when doing technical tasks such as changing your Shopify store name and URLs if you’ve decided on rebranding.