Last updated on 3rd October 2023 at 19:06 by Alex Nicholas
As a Shopify store and e-commerce business owner, one of the most important aspects of your online store and brand is the ability for customers to easily navigate through your site and find the products they are looking for.
And this is where menus and menu filtering come in because it allows customers to sort and filter products by specific criteria, such as category or price. However, as with any feature, there can be issues that arise with menu filtering in Shopify.
In this article, I will explore how we go about adding a filter to your Shopify store as well as some of the common issues related to menu filtering on Shopify, and of course, provide solutions for how to address them.
How to add filters to your Shopify store
Shopify filters are essentially options that allow you to optimise the order in which your products can be shown to customers on your Shopify store.
By adding filters you can let your customers narrow down the products they want to see by setting parameters that eliminate all but the products that fit their requirements.
But for this to happen effectively you first have to set the filters up within the backend of your Shopify store, so without further ado, here are a few ways to handle this.
Filtering with collection pages
Using collection pages is the most common and best way to filter products on your site because you give customers the widest range of any given set of closely related products to scan through.
By setting up your collection pages you can immediately show customers your best-selling products or products that are on sale.
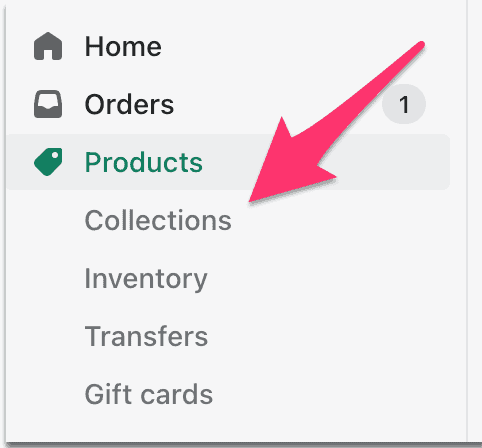
To set up your first collection page, go into your Shopify dashboard, click on the products button to expand that section then click on collections.
From the collections page click on the “create collection” button.
From here you can give your collection page a title, the H1 tag, the collection image, the collection type and add a description if you want to have one.
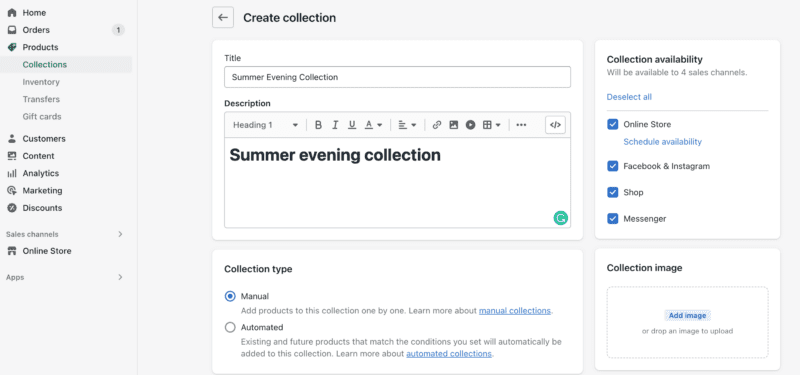
Just for your reference, I nearly always use the manual collection type because it gives me complete control over which products go into the collection.
If you use the automatic collection type you could easily end up with products within your collection that don't belong there and will cause your customer to leave because they can't easily see the products they want.
You can also add any conditions you want that suit the needs of your collection. This can end up getting very granular which can be good in some instances but isn't needed most of the time.
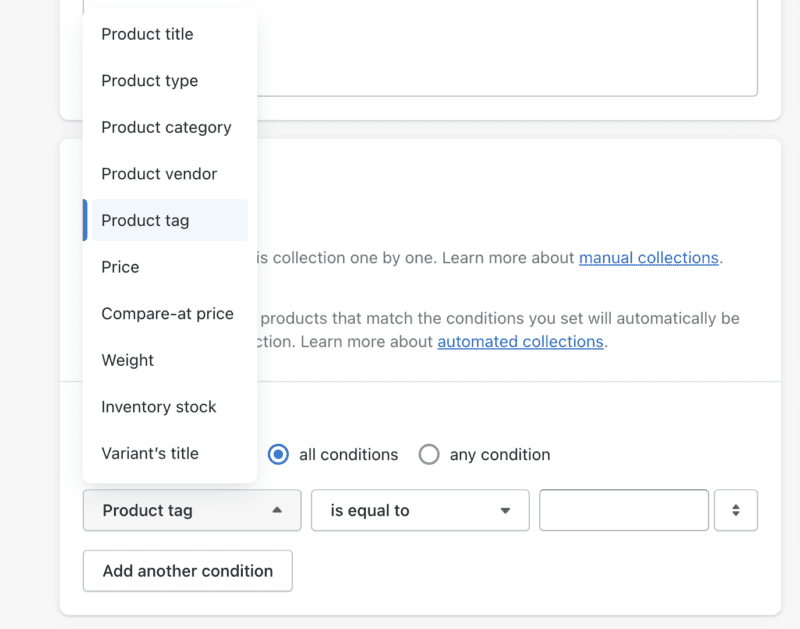
Here's the list of conditions that you can add to your Shopify collection page:
- Product title
- Product type
- Product vendor
- Product tag
- Price
- Compare at price
- Weight
- Inventory stock
- Variants’ title
Simply choose the conditions that you think might be beneficial to your customers and set the triggers for the filtering.
This is a good option for stores with a large number of products that can take a lot of filtering without these conditions in place.
Filter using tags on your products & collections
By tagging your products allows you to filter your products by their tag. And just like the conditions filtering above, filtering by tags is great for Shopify stores with a lot of products that fit into a certain category.
To add a tag to your products, go to the products from the dashboard and select a product that you want to add a tag to.
The tag box can be found on the right-hand side of the product page.
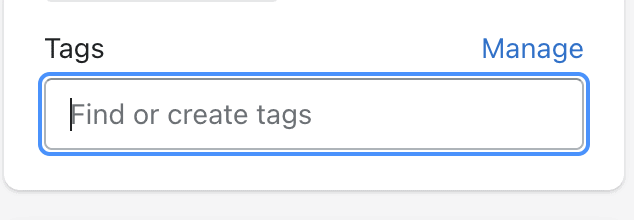
Next, click on the manage button where a new box will pop up and you can add your tag and save it so you can add it to the other products you want to add to the new collection.
If you or someone else has done this before there might be a few tags here already, and if the tag you want to use is already in there you can select it instead of adding a new one.
You can also deselect tags here, too.
Add filters to your Shopify navigation
With Shopify 2.0 some themes have started to add a filter feature via the navigation, however, if you're not using Shopify 2.0 you might not see these features in your admin panel.
Start by clicking on your online store in the dashboard, then select navigation.

Here you can see the menus where you can add new ones to suit your needs. You can also see your redirects from this page if you ever need to.
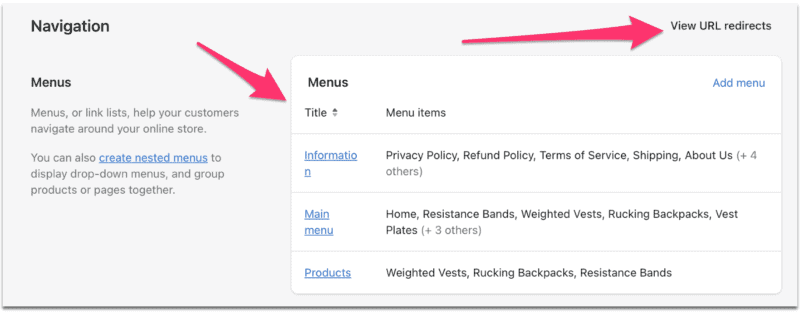
It's super simple to add menus, create nested menus and remove any existing menus if you need to.
Below the menus section is the “collection and search filters” feature. You'll need to download and instal Shopify's “Shopify search and discovery” app to use.
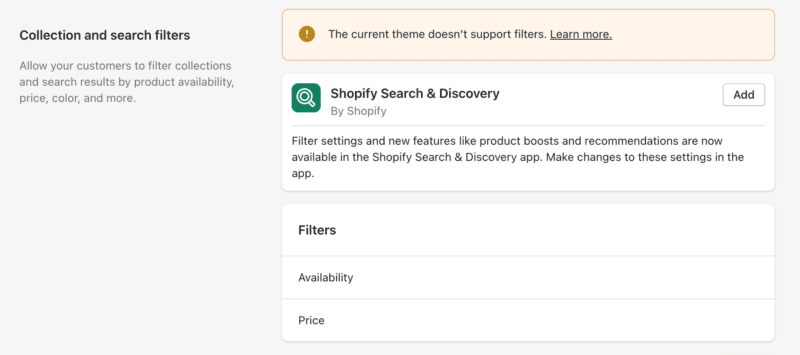
This app allows you to add and customise filters on your store that you couldn't otherwise use.
Within the overview page in search & discovery, you can add complementary products and recommendations for your customers which will enable you to cross-sell and upsell to your customers.
You can also “edit filters” from here, too.
From here you can see your collection and search filters with a list. You can remove filters from this section if you want.
To manage the filters, click on the “edit filters” button.
All of this functionality is really helpful if you have a lot of filters that you manage and need to adjust on a regular basis.
Main issues with Shopify filters
In all honesty, there aren't many issues that crop up when it comes to adding filters to your Shopify store if they're handled correctly.
But there are some potential problems that you might want to keep an eye out for.
Slow page load times
One issue that might come up with menu filtering on Shopify is that it can slow down the page load times for your site. This can be frustrating for customers and may even cause them to leave your site and could send a bad signal to Google. To fix this issue, consider reducing the number of filters available or using lazy loading techniques to only load the filters as they are needed.
Lack of customisation options
Another issue that some business owners may encounter with menu filtering on Shopify is that there are limited customisation options available. This can make it difficult to create a menu that accurately reflects your business and meets the specific needs of your customers. One solution to this issue is to use an app or plugin that offers more advanced filtering options.
Incorrect product sorting
A third issue that can arise with menu filtering in Shopify is that the products may not be sorted correctly. This can be frustrating for customers and may lead to them leaving your site without making a purchase. To fix this issue, properly configure your sorting options in the Shopify settings and test them to ensure that they are working as intended.
In all honesty, the only way this issue comes up is if you've made a mistake.
The search function is not working
One common problem I often see with filtering in Shopify is that sometimes the search function will not work correctly because the product titles, headings and descriptions aren't descriptive of the products.
This can be a problem when customers are trying to find a specific product and can lead to them leaving your site. To fix this issue, first, check that the search function is properly configured in the Shopify settings, and consider adding additional search options, such as autocomplete or search suggestions if there seems to be an issue.
Secondly, make sure that you use the headings of your products to describe your products accurately because the search function will lean heavily on the headings, and to a lesser extent the URLs of the products.
Infinite crawl issues
The impact on your site's SEO can be dramatic if your menu leads web crawlers on an infinite loop known as a “spiders web”.
This is where a search engine bot enters your site, heads into your menu and cannot get out of it because your menu structure sends it around in circles and it can't get out of the web.
The bot will quickly realise that it's going around in a circle and will simply stop crawling your site. This means that you've wasted what is known as “crawl budget”.
Crawl budget is what SEOs use to describe the effort Google goes to, to go through your site and understand it. And if it can't go through all of your site because it got stuck in the menu, you've effectively wasted your crawl budget.
This can negatively impact your site's SEO because search engines may have difficulty crawling and therefore indexing pages that are filtered by certain criteria, which can lead to a drop in search rankings.
That's a wrap on Shopify menus
Menu filtering is an important feature for any online store, as it allows customers to easily find the products they are looking for, and Shopify makes this super easy for even users on the basic Shopify plan.
However, as with any feature, there can be issues that arise with menu filtering in Shopify if not handled properly. By being aware of these issues, and taking steps to address them, you can ensure that your customers have a positive experience on your site, and are more likely to make a purchase.